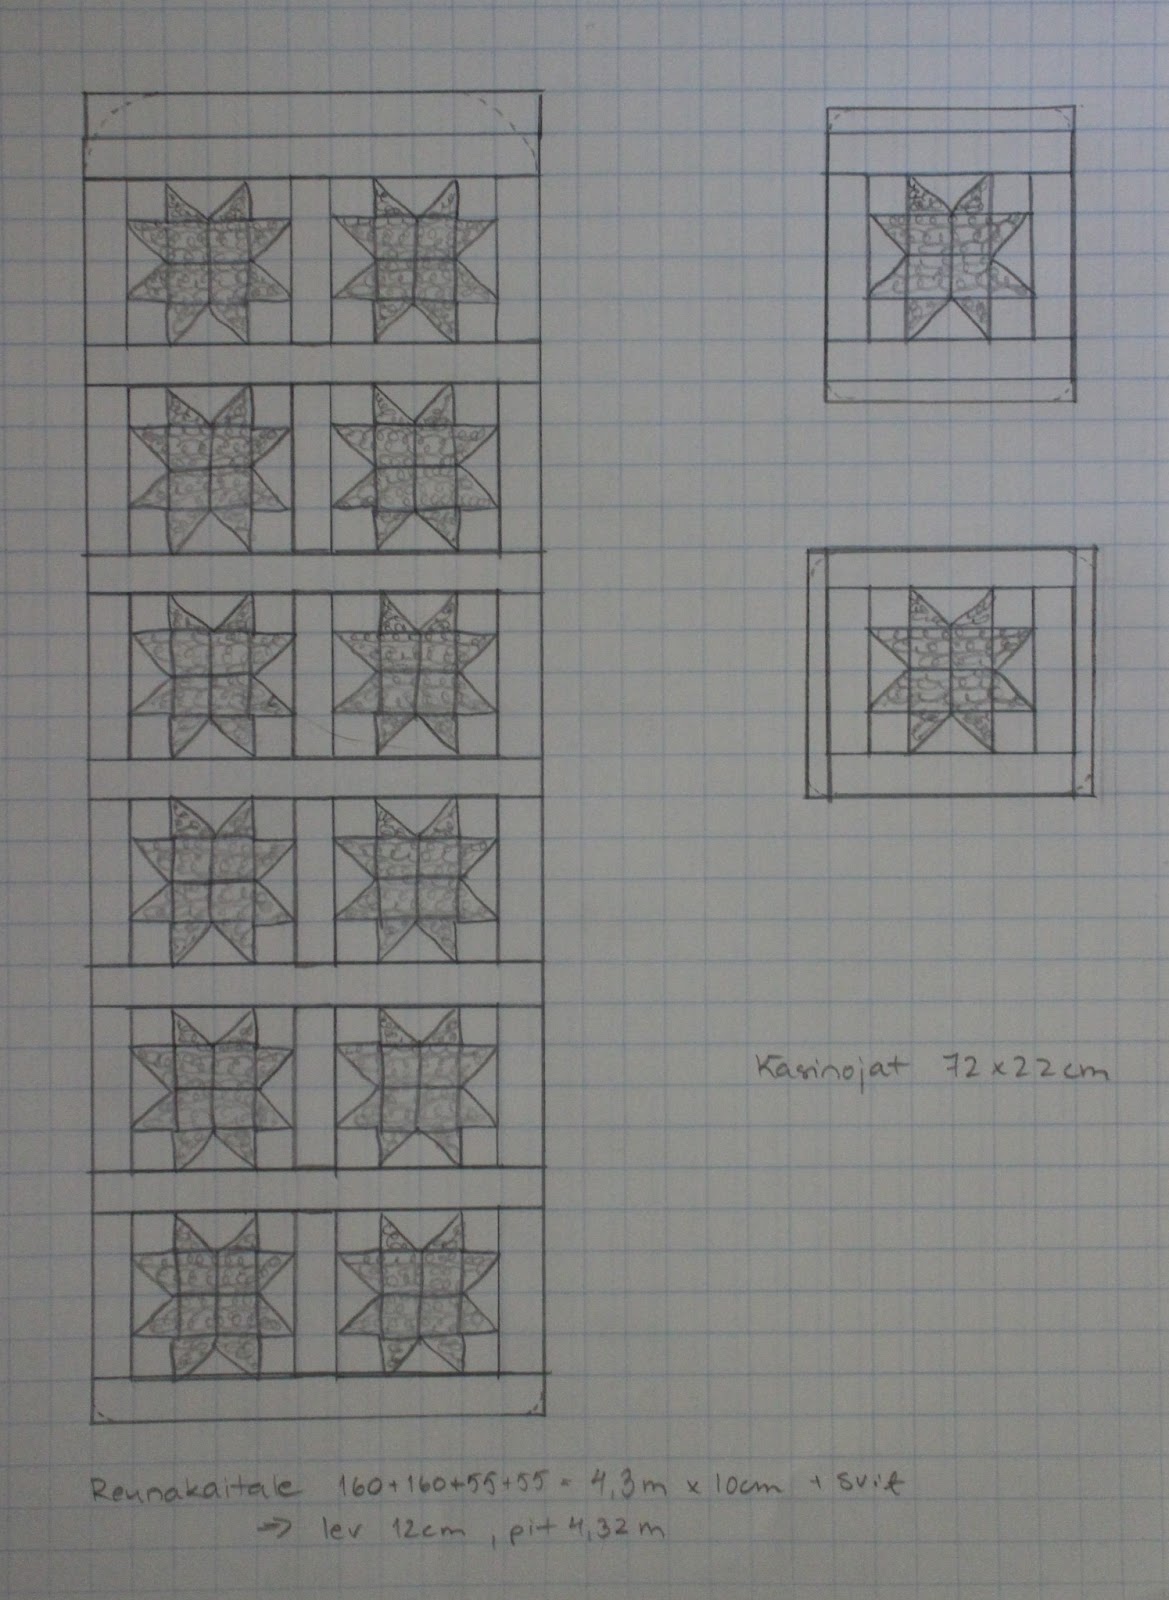
This is
my own design for the final project of my StarQult patchwork massage table cover. This is also to where we aim here with the tutorial. If you are making a patchwork blanket just copy the pattern and make it to be as many blocks wide and long as needed. One square means one 5 x 5 cm block. Investigate the pattern to notice how the space between the star blocks have been created.
The smaller parts are for the head and arm part of my massage table but very suitable for pillow covers too.
You should now have finished your StarQuilt blocks according to
the tutorial part2. Because the finished space between the StarQuilt blocks is always 5 cm it means you need 7 cm wide stripes including 1 cm seam allowance on both sides. Easiest way is to cut 7 cm stripes approximately as much as you need. No exact length is needed to be drawn here. I still use here old white sheets.
Also at this point you can sew like working on a conveyor belt. Just make sure the stripe's length is enough for one StarQuilt block.
Later on you just cut the stripe between the blocks.
At first sew the stripes between the StarQuilt blocks to create as wide line of them as needed.
Then when all the lines are ready connect them to each others. The seams are folded always towards the stripes -away from the StarQuilt blocks. I fold the seams by fingers after sewing each seam and iron only then when it all is finished.
Now, if you are making just an ordinary patchwork blanket or a cover for your massage table; in the 4th tutorial I will show you how to finish it all.