Wednesday 28 August 2013

More pampula

I finally knit something for myself. I designed a scarf of the yarns I had bought at sale. The scarf itself is crocheted by Regia Softy yarn (39% wool, 61% polyamide) but the edge is knitted by the Novita's pampula yarn. I used 300g of yellow yarn and a bit over 100g of "pampula" yarn.

 It was a bit tricky to knit this edge because the scarf is huge but I succed after I had fixed it up even twice! So, it happens to all of us. You mess it up what you are doing and sometimes have to make something more than once. But I am sure in the future this scarf will be just a joy and I will soon forget how I almost lost my mind with it. Belive or not, but because of the great find the cost of that yellow scarf was just 7,50€! Wow! Of course we don't count the hours I wasted with it.

Saturday 24 August 2013

Pampula scarf


Some time ago I bought some special yarn only to try it out. Just being curious how to work with it. It is Novita's pampula yarn. I included also informative knitting pictures. Thre's no special instructions how to hide the ends of the yarn so I used crocheting needle for it.

This scarf is made of Novita's pampula yarn (shade 893, 78% acrylic and 22% polyamide). The design is Novita's too and instruction for the scarf comes with the bobbin. You mainly see only these scarfs made of this yarn but nothing stops you to get creative and find your own ways to use it. You start the work just by picking up 8 "holes" on the knitting needle and there you go.

It is a boa scarf.
 

Sunday 18 August 2013

Robbery

For some weeks I've been seeking the Mounting Tape for my craft projects. You know; that strong, double-stick foam tape which is 19mm thick. It's great help to crate 3D effects on you card projects for example.

Well, the availability is limited. 19mm x 1,5m costs 4,50€-6,50€ at local craft stores / departments (means area 120km far away from me). I was sure that was far too high price. The prices have increased a lot lately if the product is sold as a craft material because it is a hot trend. Unfortunately nowadays craft reminds me about those sports you can't do without expencive equipment. That is so wrong because before the basic idea of craft making was recycling and creating something new with low costs or something the shop didn't even sell!

So I kept on seeking and I was right. There, at one home improvement department was sale 18mm x 10m Mounting Tape pack which costed just 2,50€! Compaired to this the previous prices were just attempt of robbery! You should always keep your eyes open when seeking materials and going through also the other than craft stores!

I had also a problem in seeking white frame. I didn't find any so I bought wooden one and painted it in white.

This is a basic craft store frame with glass. It's made of oak but unfortunately I needed just white. This oak frame was on sale and white ones were not available. So I bought the oak wood frame which I painted in white at home. I needed just one little 15ml bottle of white paint. The frame size is 20x30cm and I painted the right side for 4 times and the back side twice. The glass was impossible to take off during the painting so I covered it with paper to prevent to mess it all up. 

Saturday 10 August 2013

Felting trivet

When you hear the word trivet and felting you might think how on earth one can felt it. But anyone who has worked with yarns knows it is possible. I made this small project inspired by a day trip to city where I found a yarn shop with idea to make a small gift of it to my friend B. who is going to have a birthday and who hopefully is not around at the moment. She knows I love tea. And hopefully when ever she is having a cup of those special teas she has in her world, she feels like sharing a chat and cup with me when she opens the letter and dives into my world. :)

I must confess that the yarn shop in the city was a dissapointment to me. It was a part of those stores which have a yarn shop in every bigger city. It's selection was not satisfying. They were missing special yarns if they were not the hottest trend. The saleswomen were not the ones with obsessions and experiences. And definately they were selling products because of the money- not because of the fact they could not imagine doing anything else for their living. And that's why I reveal my greatest secrit what comes bying yarns. In Kemi yarnshop called Pieni Lankapuoti is worth of visit even you'd come from far away. Every craft lover tourist should visit it. And if you want to make a day trip, Kemi is worth of considering even you would not find anything else but Pieni Lankapuoti from there. The prices are not killing even it is a small special shop in a tiny town and definately the owners are willing to serve, suggest, seek and guide. And for sure you fine basic collection but gems too. :)

This trivet is my own design and made by crocheting and felting. Depending on the yarn and felting process the product shrinks something from 0% to 60%. I used 100g of Marks & Kattens Samo Palett 100% wool yarn (shade 592). The yarn has many shades of blue so it was easy to work on without changin the shade and it all formed out a nice spiral figure when worked in this way. This yarn is not spun so its structure is loose without any twist.

At first I crocheted the trivet and then felt it in the washing machine using normal 60 Celsius degree wash with 1000 spin-dry rounds per minute during the washing programm. The work shrunk about 50% (I forgot to measure). I took the wet trivet out from the machine, re-formed it immediately when it still was wet and let it get dry on flat surface. If you use machine felting it might feel scary to use such a hard programm but you can start with gentle one and if that doesn't bring you the wanted result you can always re-felt the project.

Monday 5 August 2013

Glass insert door tutorial

I was surprised to understand how much fixed doors mean in your home decoration. But that's not a miracle if you think how big area of the wall they take and how big area of the doors are hidden under something like furniture or decorations. And when you remember you walk through the doorways all the time so your eyes look at them many times in day. The doors make huge impression of the home decoration. If you just fix and paint them it matters a lot.

Our doors needed someone to do something to them for years. But the problem has been they looked so awful that I wanted to change them. Because this is an old house each doorway and door are different size. I can't understand howcome that is possible but perhaps it has something to do with the time the house was built (1947). So, ordering new doors would have cost fortune because they don't face any modern standar. Or it would have demanded far to much work to build the doorways to face the new standards.

So they were still just hanging there until I found a picture from a magazine. There was decorated a door by Washi Tape. It was a great and interesting idea. Unfortunately it turned out not to be cost effective in our case bacuse we had so many doors needing new life. Then I discovered I could paint the decoration on each door by using stencils. Now when the doors are done (fixed and painted) they look so great even without the decorative painting so they will stay in this way. I already bought the stencils so they are ready for me when ever I feel I want to paint the borders on the doors or somewhere else...

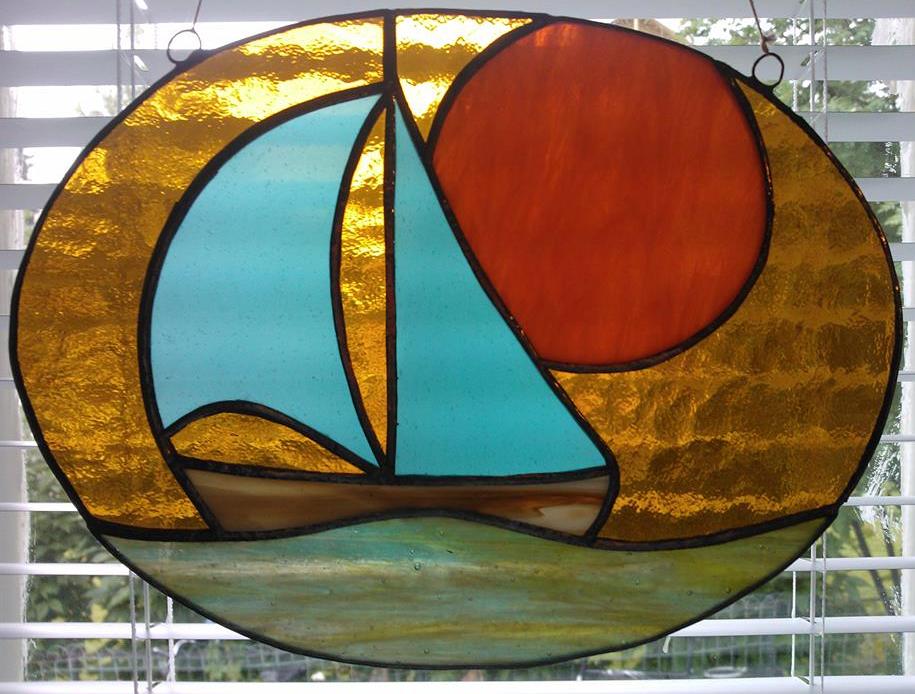
There's one door that got glass insert to let more light to the hall. It is usable idea an very cost effective.

 
I didn't make this door but it all was my idea so we can count it's my design and my work. :) Still I thank him who did this for me and used his own intelligence and skills to make it true and proper. <3 I am pretty sure if I had made it, it all would have cost me much more.

I want to introduce this door because it is easy way to save money and get a glass insert for your door which definately means more light. Making the glass insert can be done also to these "new doors" which have not seen wood almost at all and have weak structure. New doors with decorative glass cost a lot around here where I live. Making one from an old plain door is surprisingly easy and cost effective -especially if you use recycled materials.

Only new things in this door are that small round cover under the handle and the paint. That cover cost 2,50e and the paint's part is under 12e. The glass is from an old outdoor which we found from the property but the door itself turned out to be useless. Still we saved the glass and now it has got the new life in another old door.

You need to saw the hole through the door and cut the glass to the same size. The hole is good to make stronger by creating wooden frames around it. In this door is at first one plain wooden frame running around the edges. It is as wide as the door is thick. Then on the both sides of the door run two wooden frames. The first one fastens the glass (we used also silicon) and the second one hides the fasting area and decorates the door. It is easiest to make the hole, fasten the plain frame and paint it all at this point. Meanwhile the paint is drying you can work with the glass and other frames. Paint the other frames before fastening them. When they all are dry and well painted fasten the glass (set the fastening frame, turn the door to the other side, set the glass and the other fastening frame). When the glass is inserted there you can still do the decorative painting if needed for the frames and door itself. Be careful not to paint the glass if it has 3D effective structure because it is not so easy to clean it then. :)

Saturday 3 August 2013

By the treasure box

There is few fabulous dreams for a craft maker. You get boxes full of interesting materials. Or you get boxes full off chocolate. Or you get boxes filled with both. Unfortunately I have never faced such a box which includes both. Still I feel I can't complain.

My grandmother was an artist. She mainly painted but did other projects too. When I was a child my dearest memories about her lead me to the moment when she allowed me to go with her in drawing lessons. I was the only child in the class. Nude figure drawing were interesting courses even I was just 8 years old kid when started. That didn't embarras me because I was so fascinated with papers, charcoals and drawing itself. Hours just vanished and I always felt the lessons ended too early even it was almost a night time.

So, my grandmother showed me the way to drawing skills. Later when studying cloth designing these early nude figure drawing lessons proved their importance. But she taught me something else too. She taught me how to make Tiffany Glass Works. And she promised while teaching me that when she'll be gone I can have her Tiffany Glass Work machines and materials and everything which has something to do with it.

My granny passed away few years ago. Last summer I got first pack of glasses. This week I got a phone call from my mother who told she had finally found more. Yesterday we went to pick them up and today I had time to sort it all out. There was again huge collection of different kind and coloured glasses, machine and some other equipment. It was like diving into a treasure chamber when going through these boxes. It seems she wasted huge collection of money to these materials but some day in the future I will use them all by continuing her work.

I inherit my artistic skills from her so what else can I ask. This material heritage feels far too much but she wanted me to have it.

I must tell you she always gave me just the basic information but never told me what to do with the perspectives, shades, feelings etc. She said I must dig it all up from me. Whith this Tiffany Glass Work she pointed up a part of her material collection and told me I can use it -no other guidance. She was surprised but satisfied with the result. I was too -and still am.

The most important lesson she gave was -try on. And I do. Being crative and artistic is not being perfect. We all do mistakes. At the end it all is up to the fact who repairs or amends it best. :)

This is my first ever Tiffany Glass Work which I did on 1998-2000, I can't remember. Before this I made only one small study work which unfortunately broke up few years ago. (Now I have found the pattern so I can make new one on some day.) I don't know the designer of the original project conisdering this boat and sea theme. I got the pattern from my grandmother. There was no colours, just black-and-white design. I picked up the shades and types of the glass from my granny's collection and ended up to use them in this way. This was a school project at the art college by then.
Related Posts Plugin for WordPress, Blogger...