Showing posts with label BlanketSew. Show all posts

Sunday, 21 August 2016

StarQuilt -tutorial (part4)

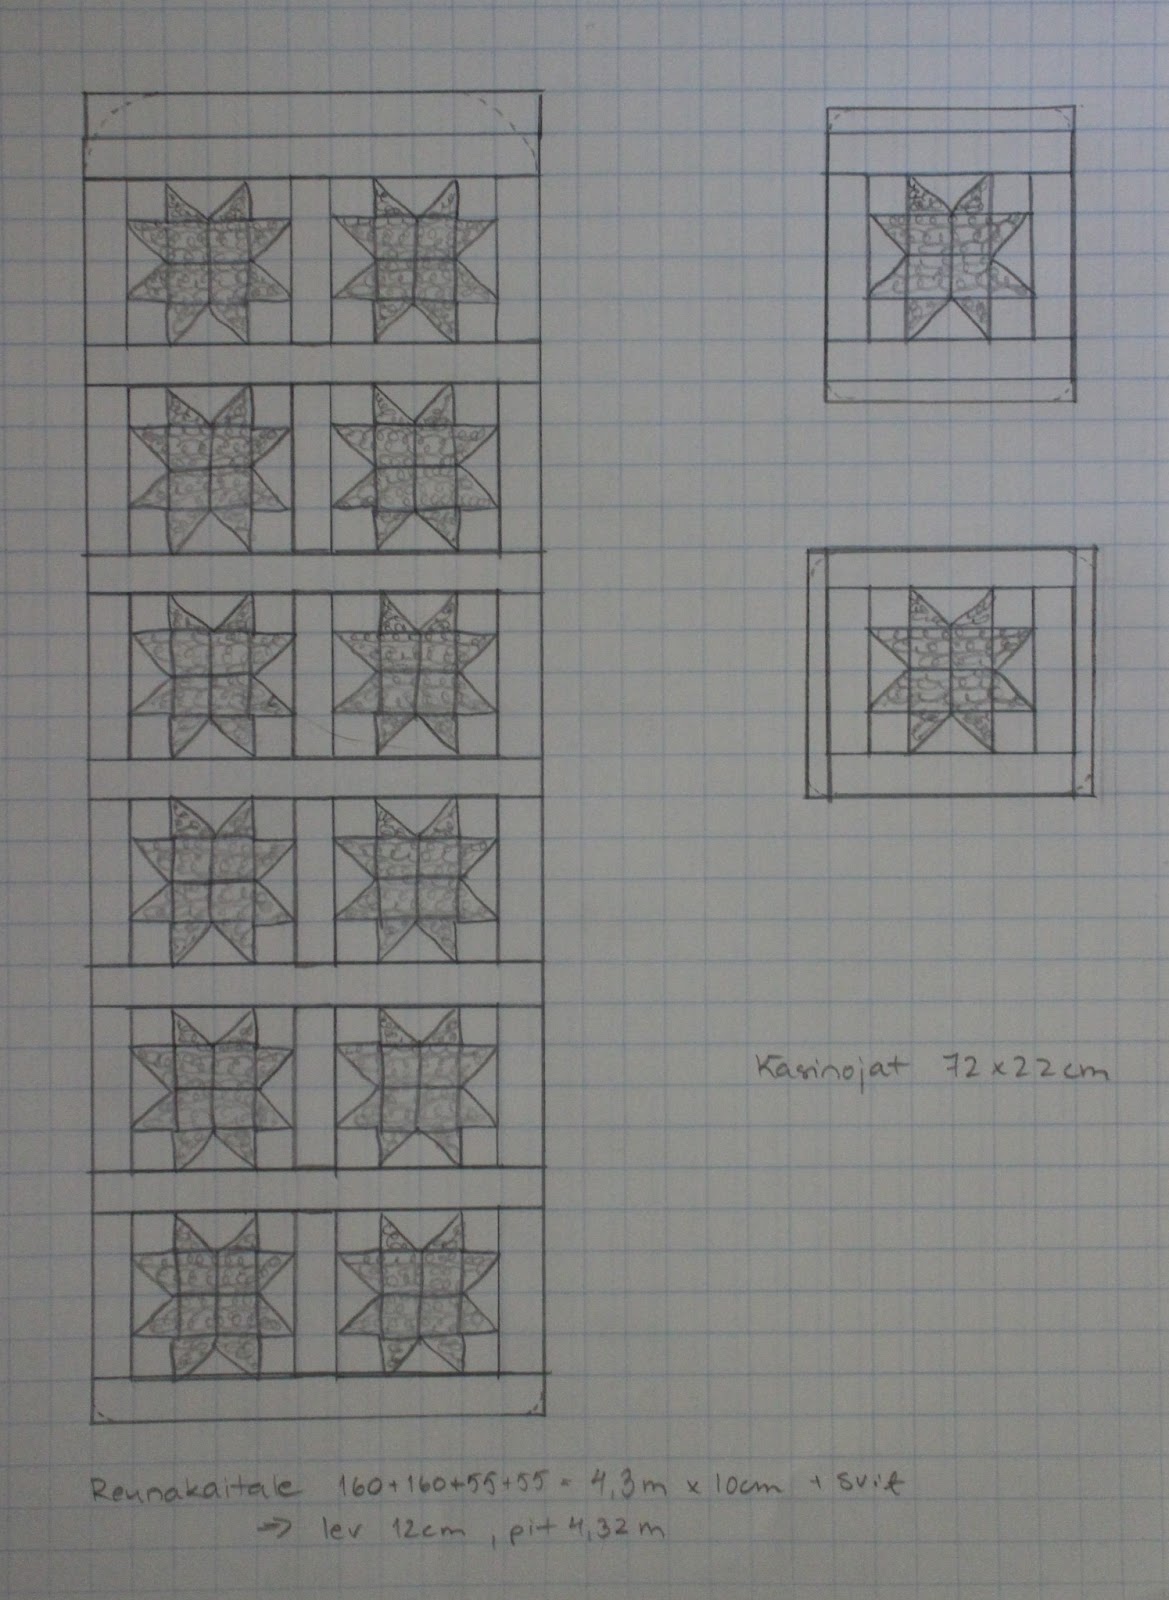
About a month ago I showed you how to make StarQuilt. At tutorial (part1) you learnt to draw the pattern and cut it all. At tutorial (part2) it was time to sew it all up. At tutorial (part3) I showed how to connect all the blocks together. Now it has came time to turn it all to be a padded blanket.

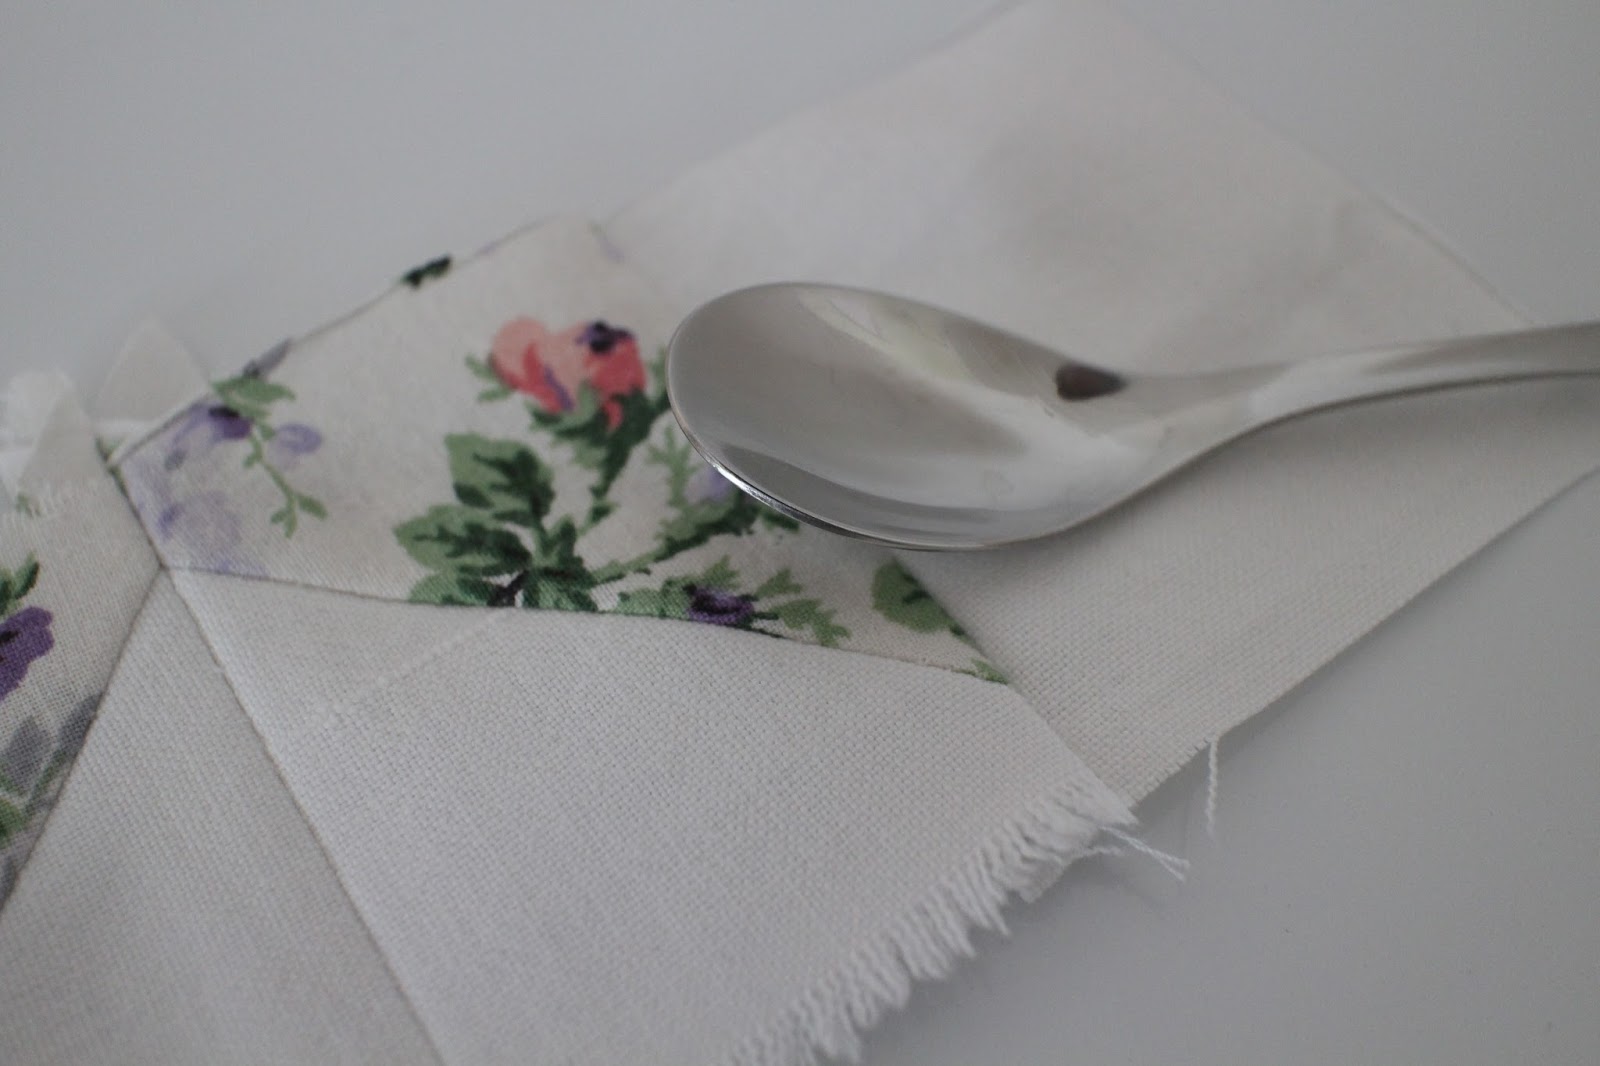
You need cotton wool for this; to make it all to become a padded blanket. If you need to connect some pieces together at any point, see the picture above to find out how to make the seam to be flat.

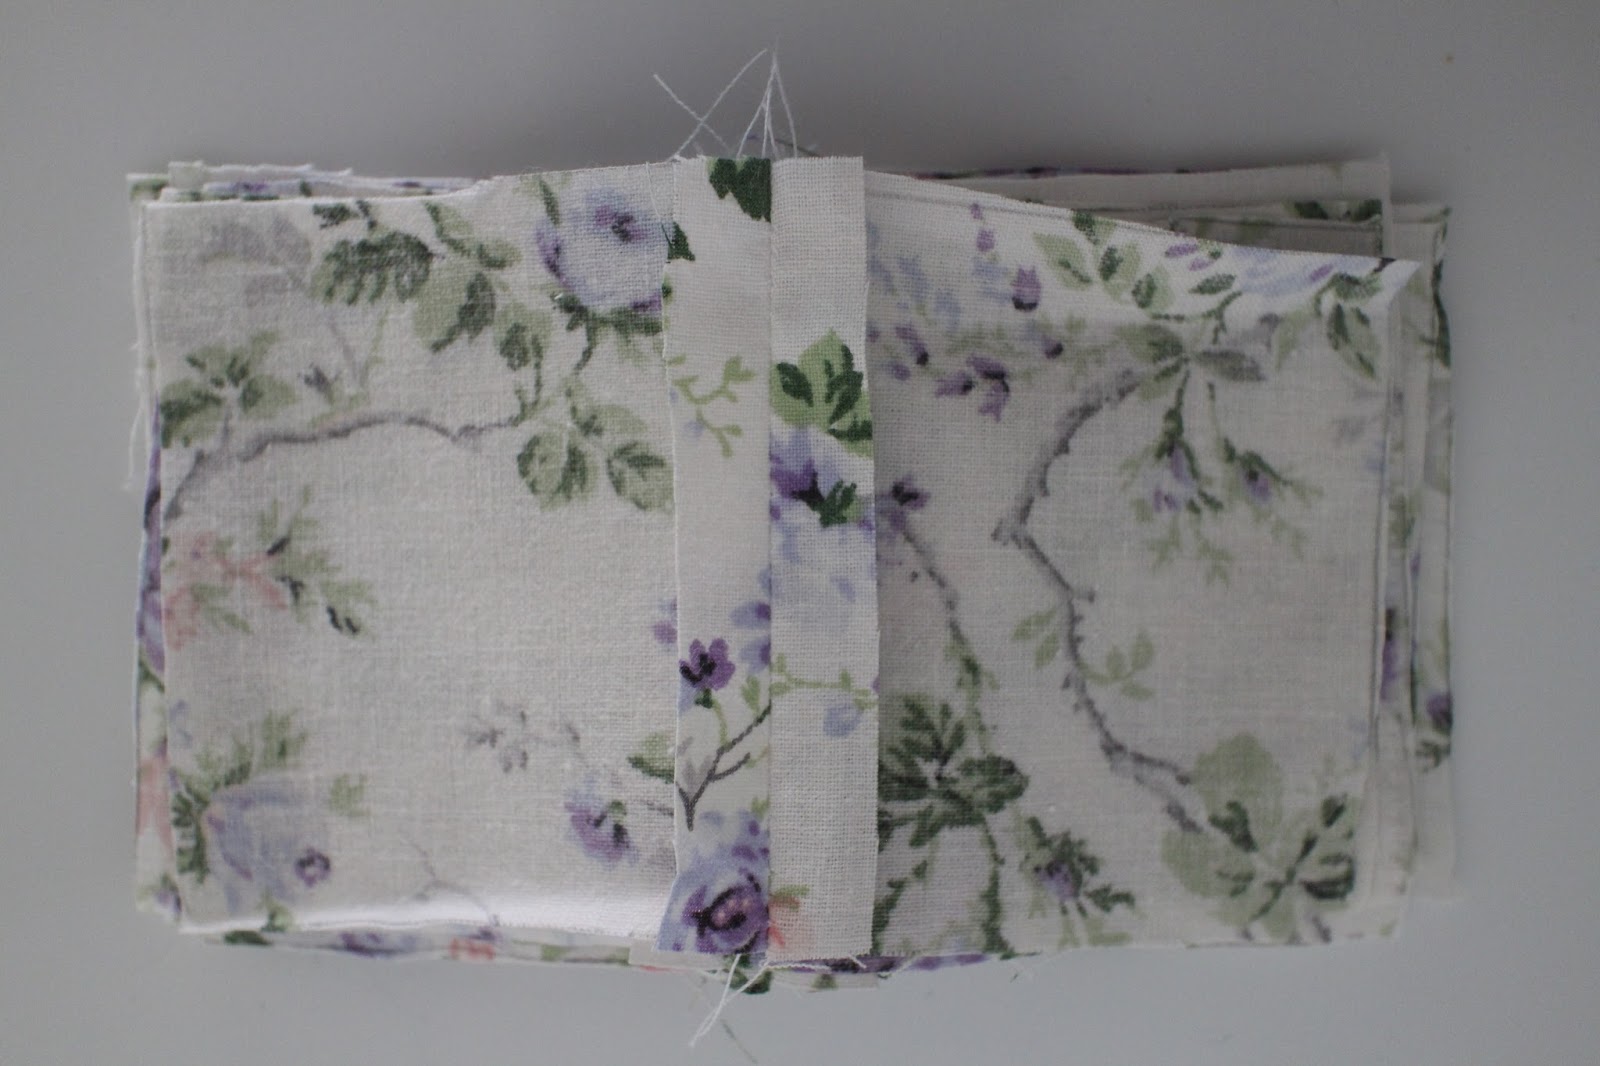
Use your connected blocks as patterns to cut the cotton wool and backside fabric. Here is block for hand part of my massage table so it needs to be small.

Fasten the cotton wool to the patchwork by sewing according to the star edges.

IF you are making just a normal patchwork quilt these blue notes are for you:

After connecting the front side fabric to the cotton wool cut the back side fabric. Then place the patchwork and backside fabrics against each others so that their fronts sides face each others. Sew the edge seams as the picture above shows. Leave 30-40 cm wide "hole" without sewing. Then turn the blanket's front side out through this hole.

When the quilt is turned up to right way make sure its corners are tidy. You can pin them to stay there where they should. Then close the hole by tiny invisible hand stitching. When the hole is closed up, pin all the edges to keep up their form. Sew the hem around approx 3-5 cm far away from the edge.

NOTICE: If your quilt is big, you can attach the backside to the front side by some decorate stitching here and there at this point.

Ta-dah! You just finished it!

BUT IF you make a massage table cover like I needed to do follow these instructions.

After fastening the cotton wool to the patchwork cut the back side fabric and fasten it to the front side and cotton wool fabrics like this. Here we don't turn anything upside down etc.

Cut and sew the side parts of the cover. If you are doing the massage table cover you know what I mean. (Unless you don't: the patchwork quilt is just as big as the levels of your table. You need the side parts to make it all to reach up under the table to get it fastened up.)

There is cotton wool between the front and back sides of the side parts. You need to sew a passageway for the elastic drawstring so remember to leave 2 cm hole to be able to get it through.

Place the elastic drawstring on its passageway. Safety pin is useful when doing it. Usually 2/3 is the right length of the elastic drawstring; if you wonder how much you need it. I had a lot of it (over 50 meters)  so I just took it as much as I evaluated it looked right and then cut it and made a knot with the other end.

After placing the elastic drawstring pin the other edge of the side part and sew it all together like on the picture.

Then pin the side and original patchwork together. Here is again the hand part cover of my massage table only to show it more clear in one pic. Then sew it all up and turn the sides out. Now you are finished with it.

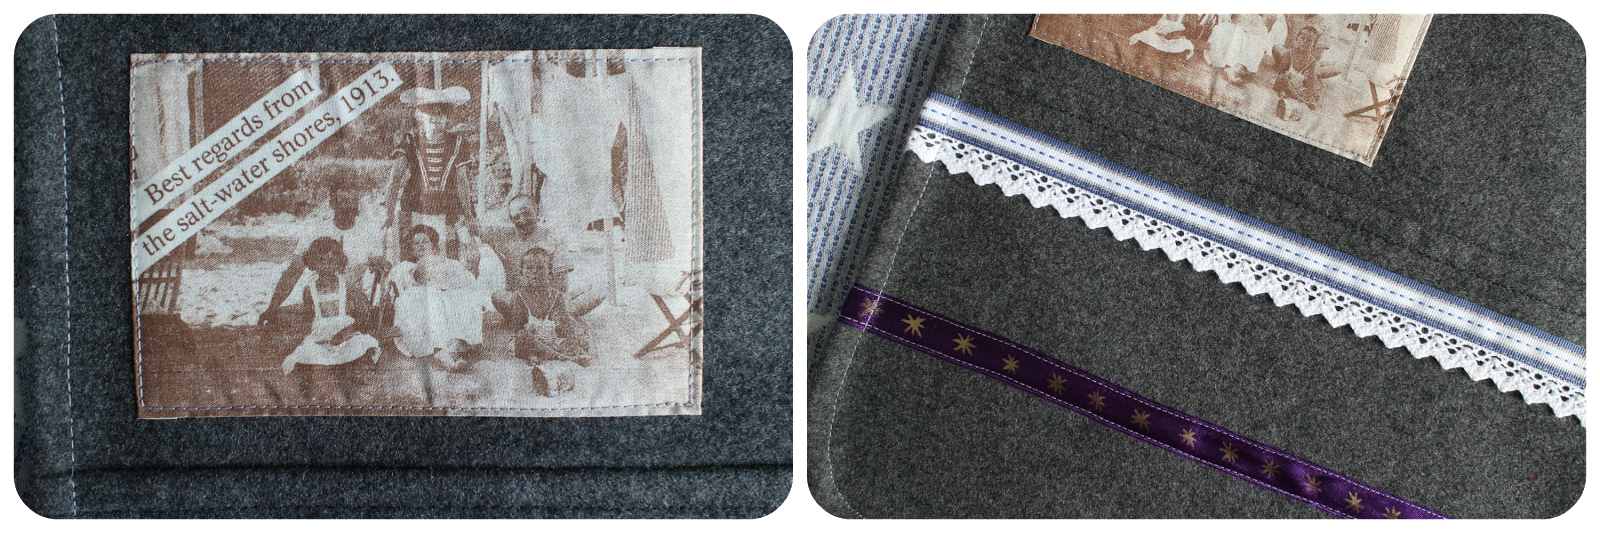
To make the side hand cover parts to stay better there where they should; I did it in this way. I made just plain parts. To the edges I fastened the elastic drawstring like this. I know it is black but as I told; I have over 50 m of it so that's why it's black. :)

I know my massage table looks just fine without this cover because we re-upholstered it when I got it. But I really needed a padded cover for it because of TheCat. She loves MyMassageTable... Well, who would not???

But the table has faux leather upholstering. It doesn't resist cat's purring claws any better than real leather. So, all the time I must have hide the massage table under a thick rug when it has not been in use to avoid the damages on it.

Now it finally has my own design brand new padded cover that doesn't mind about purring cat. And we all are happy! So is the nature; old used massage table got a new life by re-upholstering and new cover to protect it made of old curtains and sheets. I can only image how much nature resources would have been wasted if this massage table had ended up to dumping ground and I had bought brand new massage table. Not to mention how much more it have costed me. For the cover I needed to buy only the cotton wool which cost approx 26€.


Tuesday, 26 July 2016

StarQuilt -tutorial (part3)

This is my own design for the final project of my StarQult patchwork massage table cover. This is also to where we aim here with the tutorial. If you are making a patchwork blanket just copy the pattern and make it to be as many blocks wide and long as needed. One square means one 5 x 5 cm block. Investigate the pattern to notice how the space between the star blocks have been created.

The smaller parts are for the head and arm part of my massage table but very suitable for pillow covers too.

You should now have finished your StarQuilt blocks according to the tutorial part2. Because the finished space between the StarQuilt blocks is always 5 cm it means you need 7 cm wide stripes including 1 cm seam allowance on both sides. Easiest way is to cut  7 cm stripes approximately as much as you need. No exact length is needed to be drawn here. I still use here old white sheets.

Also at this point you can sew like working on a conveyor belt. Just make sure the stripe's length is enough for one StarQuilt block.


Later on you just cut the stripe between the blocks.


At first sew the stripes between the StarQuilt blocks to create as wide line of them as needed.


Then when all the lines are ready connect them to each others. The seams are folded always towards the stripes -away from the StarQuilt blocks. I fold the seams by fingers after sewing each seam and iron only then when it all is finished.


Now, if you are making just an ordinary patchwork blanket or a cover for your massage table; in the 4th tutorial I will show you how to finish it all.

Wednesday, 20 July 2016

StarQuilt -tutorial (part2)

So, you should have made your pattern and cut the fabric by now according to the StarQuilt -tutorial (part1)?

This is what we aim to.

Sew first the central square blocks. You can sew it all in a line. Meaning just don't cut the thread when moving on to the next blocks. Just reverse few stitches on the begin and at the end of each seam to secure the seam and then feed in the next blocks.

You can work in this way with each seam. It is like working by conveyor belt in mass production. It eases your job a lot. It also makes it a bit faster.

After the first seams I do my first ironing unless the fabric is impossible wrinkled to cope with drawing the patterns and cutting. Before ironing open the seams. Fingertips & nails are good for that. But if you have many seams to work with it may make your fingertips to be sore. A spoon is excellent "every house" tool for opening the seams and preparing them for ironing if you don't have any fancy sewing or patchwork equipment for this.

Open the seams from the back side and then flat them also on the front side if needed. Now the blocks are ready for ironing. When you do this preparing work you don't need to burn your fingers when ironing.

You need to also combine the triangles to be come squares again. When you have done that too; pile the blocks. See below the right folding direction for the triangle seam. It comes towards the star fabric.

We work in lines here. Connect the triangle square blocks to the central blocks like pictured above. Pay attention on it how to fold the seams! Notice you need to sew it all in the same way.  Later on you can turn half of these central line blocks upside down.

I recommend you to make the central lines first because then you avoid calculating. Which means you use just as many triangle square blocks as needed in the central parts. The remained ones are enough for the rest of the StarBlock. If you do it opposite it may be you connect too many cusps. At the end it really doesn't matter in which order you sew these four lines; especially if you have fewer StarBlocks and it is easier to keep up the calculating. But here I guide you to do it in the order "central block lines first".

So, now, connect the central lines together.

Here is how the seams should be folded.

Now, take the remaining triangle square blocks and arrange in the pictured way to make the sewing easier.

Sew the seam and fold it in the pictured way. Notice that again you need to sew them only in this way and turn half upside down later on.

Now connect the white square blocks in the pictured way. Again; fold the seams as pictured. Seams folded to the right direction makes it more tidy and eases your stitching later.

Then you just fasten the new block lines you just made on their places and fold the seams like this. It doesn't matter if there is mistake or two with folding every here and there. See mine on this block at right below corner.  These kind of errors are fine. Grander you need to fix.

Here it is; finished my own design StarQuilt block. In the next tutorial part I show how to connect the stars to become a quilt.

Tuesday, 19 July 2016

StarQuilt -tutorial (part1)

Last autumn I had my early Christmas Gift. Since that it has been longing for proper cover. I planned two bigger projects for this summer. One was warming up my vintage fur coat. The other is this: to make pretty cover for my massage table as my own design.

Before -years ago- I made two decoration pillows by using patchwork method. The red shade fade away time ago but I saved the pillows as a sample. These pillows are my own design. I also did the pattern. But I had some difficulties for exact matching. I had done patchwork before but not this kind of. So, I saved them all for furter investigation to find out could I do it better.

I wanted to use simple patterns. Just two squares. Finished size for one square is 5 x 5 cm; and I keep it as a square or slice it to become a triangle. That means the pattern for 5 x 5 cm square needs to be 7 x 7 cm including 1 cm seam allowance. The square pattern for sliced square was 8 x 8 cm but I had some problems with it and needed to make smaller seam allowance to connect two triangles to be a square. I knew it was up to the mathematical counting. Dear MrW was very kind at early morning when he woke up and right with his dusty eyes he calculated and draw me better pattern. The size of the square which I aim to be sliced needs to be 8,4 x 8,4 cm; not 8 x 8. Thank you soooo much!

Here are the pattern and design. If you change the size of the squares see above MrW's pattern to count the needed size... If you have clever mathematical skills... In my design 1 square of the paper describes 1 cm. This kind of patterns are easy to design on squared paper.

Make the square patterns from thicker paper like cardboard paper. It is much easier and faster to drawn the patterns of the fabric if the pattern is thick. Easy way to get some hard pattern paper is just to look around. Many foods are packed in carton boxes despite they are placed in a plastic back before that.

Then you need to count how many StarQuilt blocks you need. I need 14 for my massage table cover. As well you can make just one normal quilt. It all happens in the same way. At the end I just will sew it all to the massage table cover form.

For the stars I will use old fabric which has dear history. Some people use brand new fabrics for patchwork. The others use old ones. Which ever is your choice remember to make sure you are using proper fabrics. If old ones are already weak; just don't pick up them. You will only cry your eyes out of your head when making a huge work only to find out the quilt begins to rupture.

Don't forget you can use old clothes too! Remember to use only clean materials. They also must be able to wash and iron.

I will use some white too. It is from old sheet. I always save old sheets. Meaning the ones that are in proper fit but so old that modern beds just are too big for them.

After picking up your fabrics you need to draw the patterns on the fabric. This method is for those who don't have all fancy quilting equipment. Just the old fashion method before everything fine and expensive was discovered.

You can iron the fabrics first or afterwards or how ever you prefer it.

As you saw I had only two square patterns; no triangle even I need ones. It is because I found it easier in this way. Later I just used pen and ruler to slice the 8,4 x 8,4 cm square.

When you have drawn enough squares cut them off. As you can see; I cut only squares. To keep them in better order and safe I will slice the needed pieces right before sewing. I don't trust in my animals that much that smaller parts would stand in piles and not to be spread around or get lost.

Next tutorial part will show you how to sew the StarQuilt block.

Wednesday, 1 July 2015

SnugglyBabyBlanket

Oh, they all love to snuggle up safe and sound. They love to cuddle and tiny fingers explore the world until the eyes close up and the soul falls asleep.

I made BabySensorySecurityBlanket. It is my own design. I used all soft and interesting materials I found from my treasure boxes.

I used ribbons and tags.

Few details which all feel different.

Litttle bit of this and that.


Monday, 24 October 2011

I feel the cold arriving

Lately I have been doing a lot Christmas stuff. Card making was a bit... hmmm, the result is I could sell 90% of the cards or will keep them and have the cards ready for the comming years... for the rest of my life.

I also sew a seat covering for a pulka keeping eye on comming winter. Long time ago I crashed at 100% sheep wool teddy fabric and bought the whole pack of it with a friend and then we shared it. I still have a bit left and I already miss more of it. So warm and useful! I have made several baby blankets of it for example.

Here is seat covering for a pulka. It is made of 100% sheep wool teddy fabric. The lining is 100% sheep wool too. It is made for arctic outdooring for a little boy. There's also woollen socks for the same little man. You see often seat coverings made of animal skin -like sheep or reindeer- but this 100% sheep wool teddy fabric is good option also for those people who don't wan't to use anyone else's but their own skin & fur. :) Seat covering and socks are both my own design but you don't need to be a genius to be able to design and sew a seat covering -not to mention about woollen socks. :)