Friday 30 November 2018
NewTapestryProject
This is the last tapestry project that is left of the ones I inherit. I used BrokenCanvas for a sewing project. I finished Birds Collection. I also finished WinterScene and SummerScene. This project is not started at all. It was also a bit dirty so I had to wash it out before starting. That's why the paint is faded. I have no idea which shade was meant for which bigger tapestry project I've been stitching because it all has been messed up. Now there's a pile of threads left. We'll see how this will turn out....
Thursday 29 November 2018
SummerScene
It is a bit confusing because they definitely are from the same designer / manufacturer. It says "sommer" and "winter". It is confusing because it gives a hint about Swedish, Danish or Norwegian origin, but "winter" is actually "vinter" in those languages. (In Finnish summer is "kesä" and winter is "talvi".)
Wednesday 28 November 2018
HeartBunting
I made two different style of hearts. The ones with felt decoration and the others with embroidery. Then I needed some ribbon to sew them all together.
I used old wooden & recycled curtain hangers (I removed the metallic parts) to hang the bunting.
I like it in dark...
...and I like it in light.
Tunnisteet:
bunting,
craft lifestyle,
cross stitch,
embroidery,
felting,
sewing,
stitching,
Taija design
Tuesday 27 November 2018
Monday 26 November 2018
Stitched Hearts
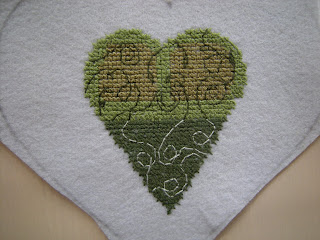
Here are my own designed embroidered bases for XHeartS. They look so different without the decorations!
Tunnisteet:
cross stitch,
embroidery,
felting,
stitching,
Taija design
Sunday 25 November 2018
The Light House No1 (free chart instructions)
In this blog is The Light House No 1 -free chart.
Here are the English instructions for making it.
Here are the English instructions for making it.
Basic work
Needle: Tapestry 18
Fabric: 8 Count Aida
Fabric size: min. 25 x 35 cm
Use 3 strands of the skein for cross stitches
Use 2 strands of the skein for back stitches
DMC Blanc (4,6m)
DMC 828 (2m)
DMC 973 (0,2m)
DMC 318 (8m = 1 skein)
DMC 798 (3m)
DMC 317 (2,5m)
DMC 666 (0,2m)
DMC 824 (52m = 6,5 skeins)
DMC 310 (0,8m)
Bunting
Needle: Tapestry 24
Perforated Paper: 14 count
Perforated Paper size: 20 x 12 cm (you can use small left over pieces)
Use 2 strands of the skein for cross stitches
Use 2 strands of the skein for back stitches
Make 38 different kind of flags with desired shades (you can use your loose end threads)
Form out the buntings and fasten them in desired style across the Light House No1 design
Design the bunting.
Prepare the bunting.
Arrange again with the fabric.
Cut off the extra.
Sew the edges by using fabric stripes.
Sew them around the picture to form out the frame.
Take the bunting threads through the fabric to the back side.
When you are sure all the bunting is there where you want; turn out the fabric.
Be careful!
Fasten the loose ends the the back side to keep the bunting stay there where you want.
Watch out not to tighten too much!
Stitch around the picture.
Sew the bands for the hanging.
Pin the back side fabric and cotton wool to the front side picture.
The front side picture is between the fabrics.
Remember to pin the front side picture face against the back side fabric.
Remember to include the bands for the hanging.
Sew around.
Leave 10 cm hole somewhere for turning out the project later on.
Be careful when turning out the project.
Remember you have the bunting there!
Close the 10 cm hole.
Sew around the edges to make the hanging to keep its shape better.
Monday 19 November 2018
Beads&Party
Well, well, well... You can do beading also in this way. I used 4 different shade of beads: bright glass, ice blue, rainbow and black diamond. This is easy and low budget hair style for any party and can be done at home. Just do first the upper part and then curl up the rest.
I attached the beads to hair by sewing. It is easy to collect them to be reused. You just need some help when opening it all.
I attached the beads to hair by sewing. It is easy to collect them to be reused. You just need some help when opening it all.
Tunnisteet:
bead,
craft lifestyle,
hairstyle
Tuesday 13 November 2018
YuleBag
Do you remember Me stitching SeasonsGreetings designed by Donna Kooler? Now I have done something with it.
I made a cute bag for YuleDecoration. I designed the bag I sew.
There is a special secret inside....
Tunnisteet:
aida,
back stitch,
case,
Christmas,
cross stitch,
Cross Stitch Designs,
Donna Kooler,
sewing,
Taija design
Monday 12 November 2018
RunesKeyRing (travel)
This is my own design RunesKeyRing. It is a symbol of travel / journey. I stitched it on 14 count PerforatedPaper.
Tunnisteet:
keyring,
Perforated Paper,
runes,
Taija design
Saturday 3 November 2018
WinterScene
This is a tapestry work My grand mother started decades ago. I have no idea about the designer nor company. After she passed away this has ended up to Me; just like Birds Collection. She had finished the scene so I finished the background. I must confess it was a bit boring but now it is done! I have another similar tapestry project started now after this. It is SummerScene.
Subscribe to:
Posts (Atom)


