Valentine's Day 2020 was special because of the high school ball YoungLady participated. This time my wish was to find a dress from a shop. I knew I'd have quite much work at the time and I also got injured in October 2019. So, YoungLady made a huge job seeking dresses from internet. We wanted a dress she could use later on despite most of the dresses at the ball are princess' dreams. You could always sell the dress but that is not very easy around here where people are fewer and most of them want brand new dress. Recycling is The Thing so we started from the idea she could use the dress many times at different occasions.
This is the first ever dress she found from a shop. In her life I have always made her "better dresses". I share this tutorial with you because you might find a dress for a ball or party from a charity shop and just by some fixing it will be unique and perfect for the needs. Old wedding dresses can be taken consideration too; especially if you add a bit this and that to dress off the wedding expression...
To wide the dress lining you need to hang the dress somewhere...
...and clip up the skirt to make it to stay away and not to disturb your working.
Then you need the count how many seams you have and measure the length...
...all the way. Notice not to start too high. Make sure you start there where you still can work with your sewing machine. And remember to leave the pins on to mark the points!
Then cut as many triangles as you had the seams (you can draw a paper pattern if not sure will you do it right).
The height of the triangle is the same plus 3 cm seam allowance as the the height you just measured was.
The base width of the triangle is "as much as you need" MEANING that you need to estimate how much space you actually need at the end and share it even with the triangles. It's ok to have rather extra than to make it too small. (You need to measure the petticoat's width that needs to fit under the dress and the dress' lining width and see how much you are missing.)
After cutting off the triangles go back to the dress to unpick the seams all the way up to the pins.
Use some tape to clean the mess.
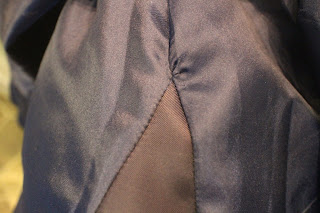
After neatening the triangle side edges and lining seam edges pin one triangle at time to the lining and fasten by sewing. (Neaten them separate so later on -in the future- if you need to unpick the triangles it will be easier and faster.)
Be careful at the upper corners but don't stress up too much about them. They are so hing that won't be seen. Just make sure they turn out "thin" so they don't form out lumps that can be seen through the dress.
This is just fine.
The triangles need to be shared even around the dress lining to form out steady and ordered outfit for the skirt. If your dress has not more than one seam just cut out one extra with scissors. If you make the widening only to one part it will make the result to twist and twine and the skirt won't land well over the lining.
The skirt fabric is not in order nor ironed in this pic but you can see how wide it actually is, the lining was just smaller. In this pic the petticoat is under the dress but the dress will be just fine without it too. And the triangles can be unpick when ever needed.
Later on you'll see proper pics of the dress and the hair I did myself...


